Red Velvet Liège Waffles

Red Velvet Liège Waffles
Ingredients:
1 1/2 tsp active dry yeast
1/2 cup scalded buttermilk (you can make your own by replacing a tablespoon of milk for every cup with a tablespoon of white vinegar or lemon juice; let stand for 5 minutes before using. In this case, only half a cup is needed so 1 1/2 teaspoon as there are 3 teaspoons in a tablespoon)
3 tbsp water
2 cups bread flour
½ cup unsweetened cocoa powder
1 extra large room temperature egg, lightly beaten
1 tbsp + 1 tsp light brown sugar
1 stick unsalted butter- melted and cooled to room temp
1 tbsp honey
2 tsp pure vanilla extract
1 tbsp + 1 tsp light brown sugar
1 stick unsalted butter- melted and cooled to room temp
1 tbsp honey
2 tsp pure vanilla extract
2 tbsp red vegetable food color
1/2 cup Belgian Pearl Sugar
Directions:
1. Sift together bread flour and cocoa powder
1/2 cup Belgian Pearl Sugar
Directions:
1. Sift together bread flour and cocoa powder

2.
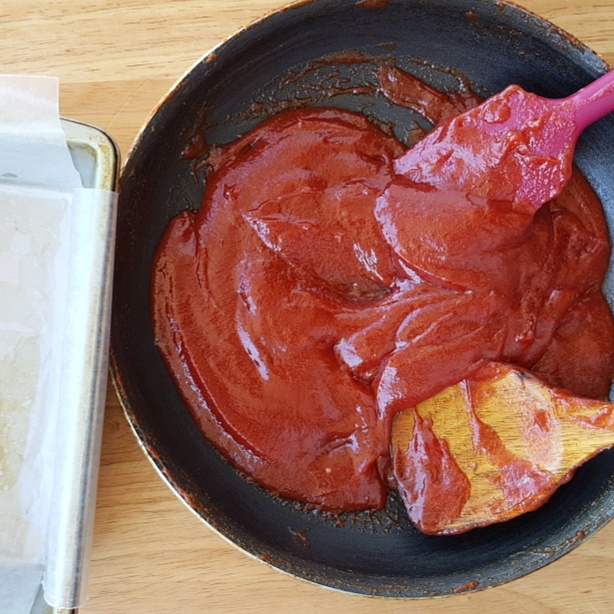
Place yeast, buttermilk, red vegetable food color and water into the work bowl
of a stand mixer. Stir for a few seconds to moisten the yeast.
3.
Add the egg and 1/3 of the flour mix. Mix to blend. Scrape down sides of bowl.
3.
Sprinkle remaining flour over the mixture, but do not stir it in. Cover and let
stand 75-90 minutes (you’ll notice the batter bubbling up through the cover of
flour by the time expires). I did it for 90 minutes and with good
results.
4.
Add brown sugar to the work bowl and mix on low speed just to blend.
5.
With machine on low, add honey and vanilla. Then add 2 tbsp of butter at a
time. Mix 4 minutes at medium-low speed; scrape down sides once or twice in
that period. Let the dough rest for 1 minute and then continue to mix for 2 minutes.
If you measured your ingredients perfectly, the dough will be sticking to the
sides of the bowl in the last minute of mixing and then, in the last 30 seconds
of so, will start to ball-up on the paddle. If this does not happen, let the
dough rest for 1 more minute and mix for another 2 minutes. Whatever the
outcome of the extra mixing, proceed to Step 6. I didn't encounter any
problem so it was full speed ahead to the next step!
6.
Scrape the dough into a large bowl, sprinkle lightly with flour, cover with
plastic wrap and let rise at room temperature for 4 hours. This step is crucial
for developing the flavor.
7.
REFRIGERATE FOR 30 MINUTES BEFORE PROCEEDING TO STEP #8. This is essential. The
yeast respiration must be slowed before continuing. I didn't miss the
step this time :-)
8.
Stir the dough down (meaning: gently deflate the gases from the dough, by
pressing on it with a rubber spatula), scrape it onto a piece of plastic wrap,
and then use the spatula to press the dough into a long rectangle. Fold that
rectangle over on itself (by thirds – like a letter) so that you have a square
of dough. Wrap it in plastic, weigh it down a bit (I put two heavy dinner
plates on top of it) and refrigerate overnight. Mine was rectangular
all the way
9.
The next day, place the cold dough (it will be quite firm) in a large bowl and
add all of the pearl sugar to a bowl. It will seem like a lot of sugar, but
it’s supposed to be mixed into the dough by hand until the chunks are well
distributed. Divide the dough into 5 pieces of equal size- I did six
though because I think five is too big and used more sugar pearl this time
because the batter itself hardly used sweetener except for a tablespoon honey
and a little brown sugar.
10.
Shape each chunk into an oval ball (like a football without the pointy ends)
and let it rise (covered loosely in plastic wrap) for exactly 90 minutes.
10. Preheat waffle iron and cook each
waffle according to waffle iron instruction. It should beep when done,

Like the
regular Liège waffles from an earlier post, some sugar pearls didn't melt
and just stuck to the waffles but no worries, these are brittle and will not
ruin your teeth.

Creme Anglaise Sauce
1 1/2 cups half-and-half
4 large egg yolks
1/3 cup sugar
3/4 pkg softened cream cheese
1 tsp pure vanilla extract

1.Warm the milk or cream in the sauce pan and remove from heat.
2. In a medium, heat-proof bowl, whisk the yolks together and then whisk in the sugar then the cream cheese. Continue whisking until the mixture turns pale yellow and forms ribbons on the surface.
3. While whisking steadily, pour the milk into the egg-sugar mixture in a steady stream.
4. Pour the mixture back into the sauce pan and set over medium heat. Stir constantly to make sure the bottom does not burn or the eggs curdle.
5. Continue stirring until the mixture thickens enough to fully coat the back of a wooden spoon.
6. Strain the custard to remove any bits of eggs that may have curdled and stir in the vanilla.


I'd be willing to get this "stuck" in my stomach....ohhh yeah!
ReplyDeleteThis is something I'm sure you'll enjoy like you did the regular one I made before.
DeleteAbsolutely brilliant! Liege waffles are one of those things that I LOVE, but don't make often. This just elevates it to a whole new level. I have some pearl sugar sitting at home, so I think I know what I will be making this weekend.
ReplyDeleteIt requires more work than the average waffle but it's worth it! Please let me know how it turns out when you make it :-)
DeleteI made these yesterday, and they were delicious! Still, I think I prefer the plain Liege waffles. I did get lazy and skip the creme anglaise, which probably could have changed my mind. I just didn't want to end up with all those leftover egg whites!
DeleteExactly my sentiment! It's actually the creme anglaise that made it delicious as in the case of anything red velvet- without the cream cheese frosting, it's not that great lol. That's also the reason why I add a little extra cocoa powder even when I make cupcakes; cakes; etc- without that chocolaty flavor and buttermilk to make it moist- I don't think it can stand alone unlike the plain Liege.
DeleteI had a Bit of a bitter taste, still came out good but i would like it to be sweet like a liege waffle... suggestion?
ReplyDelete